|
||
 |
||

|
|
||
|
||
|
|
While installing a garage door opener is a relatively straightforward project, the installation process is too detailed - and too manufacturer-specific - to be covered fully in any brochure. The purpose of this brochure is to give you an overview of the process, either as preparation for installing your garage door opener or to help you decide whether you can install the opener yourself.
The procedures outlined in this brochure are based on instructions provided by Stanley Door Systems. Other manufacturers' installation procedures may vary. When installing a garage door opener, always refer to the manufacturer's instructions for detailed, step-by-step procedures and follow them closely.

SAFETY PRECAUTIONS
Before Installation:
During Installation:
After Installation:
|
|
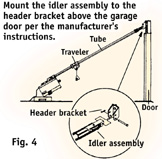
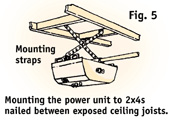
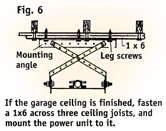
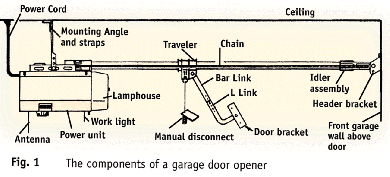
 INSTALL ING THE OPENER
|
|

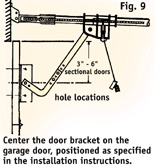
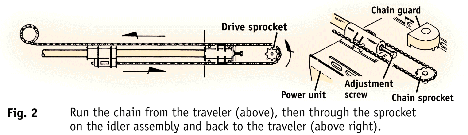
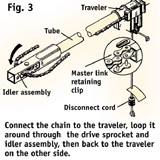
CONNECTING THE OPENER
|
TOOL AND MATERIAL CHECKLIST
| Garage Door Opener | Stepladder | Pencil | Steel Measuring Tape |
| Electric Drill | Drill Bits | Hammer | Screwdrivers |
| Adjustable Wrench | Pliers | 1", 2" Lumber for Shims | |
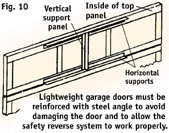
| 1" x 6" Mounting Board if Opener will be mounted to a drywall ceiling | Steel Angle for reinforcing lightweight garage doors | ||
Check your state and local codes before starting any project. Follow all safety precautions. Information in this brochure has been furnished by the National Retail Hardware Association. Every effort has been made to ensure accuracy and safety. Neither the NRHA nor the retailer can be held responsible for damages or injuries from the use of the information in this document.