
|
 SEEDING YOUR LAWN SEEDING YOUR LAWN
- It's best to seed your lawn in the fall, if possible. Of course, lawn seed can be sown
at other times of the year. But fall is the ideal time for seeding to rejuvenate an
existing lawn or to start a new one.
- In most parts of the United States, an existing lawn should be reseeded in late August
or early September. This gives the new grass seed time to grow during the cool fall days.
- Before reseeding thin or bare spots, rake the lawn thoroughly with a broom rake. Use a
heavy-duty broom rake with looped spring braces between the handle bar and spacer bar for
this type of lawn raking. Broom rakes are available with either flat steel or wire teeth.
- A multi-purpose rake Å sometimes called a double-duty rake Å may be ideal for removing
a heavy build-up of thatch on your lawn. (Fig. 1)The rake's sharp teeth on one side
will easily remove the thatch. The flanged teeth on the other side make it easy to
pulverize the soil in preparation for reseeding.
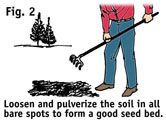
- After the lawn has been thoroughly thatched and raked, the thin and bare spots will be
more easily visible. Loosen the soil in any of the bare spots to a depth of about 1"
or more with a speedy cultivator or some other type of handy soil-loosening tool (Fig.
2).
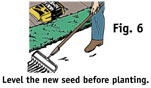
- After loosening and pulverizing the soil in the bare spots, sprinkle the newly prepared
area with the proper amount and type of lawn fertilizer. Then, rake it level.
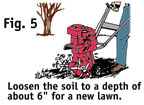
- If the bare spots have been compacted by heavy traffic, loosen the soil to a depth of
about 6". Then, pulverize the soil and add a small amount of peat moss or gypsum to
help keep it loose after the reseeding.
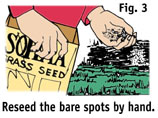
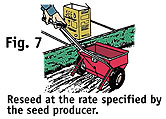
- When the soil is thoroughly loosened and leveled, reseed with a top-quality seed. Select
a grass seed mixture that is specially prepared for the type of location you are
reseeding. For example, some seed mixtures work well in shady areas, while other mixtures
are made for reseeding sunny areas. Ask a salesman in your local retailer's lawn and
garden department to help you select the correct seed.
- Reseed the bare spots by hand (Fig. 3). Reseed the area sparingly - only about 6
seeds per square inch will survivie. Sowing the seed too thickly simply wastes seed and
money. After the seeds are sown, spray the area with a ligh mist of water.
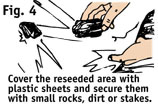
- Your new grass will get off to a much faster start if you cover the reseeded areas with
clear sheets of polyethylene plastic. This covering keeps the moisture in the soil and
eliminates the need for constant sprinkling. Secure the edges of the plastic sheet with
small rocks, dirt or stakes (Fig. 4).
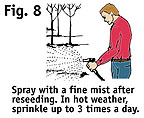
- Take care to remove the polyethylene cover when the first seedlings appear. The cover
helps the seeds until they germinate, but it will kill all seeds quickly unless it is
removed when you see seedlings. After removing the cover, keep the soil moist by spraying
it with a light mist two or three times a day until the grass is about 1" high.
Continue to water newly seeded areas about once a week until the new grass is about
3" tall.
|


 STARTING A NEW LAWN
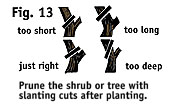


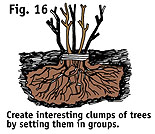
 PLANTING
TREES AND SHRUBS
PLANTING
TREES AND SHRUBS 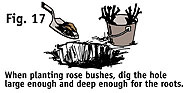
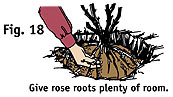
 PLANTING
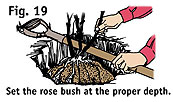
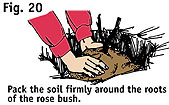
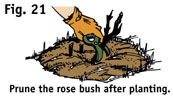
ROSE BUSHES
PLANTING
ROSE BUSHES 