|
||
|
||
|
||
|
|
||
|
||
|
||
|
Here are tips and instructions on how to replace sink, bath and shower faucets. Following these and manufacturer instructions can help you save time, money and effort. It can also help you end up with a neater, more satisfactory installation.
 |
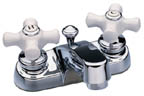
 PURCHASE
THE CORRECT FAUCET PURCHASE
THE CORRECT FAUCET
|
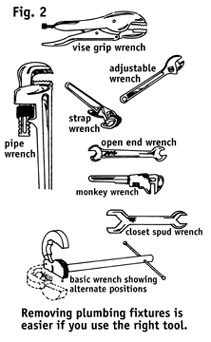 |
 USE THE
CORRECT TOOLS USE THE
CORRECT TOOLS
|
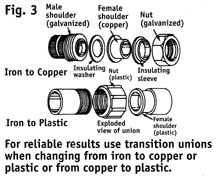 |
 CONVERTING FROM IRON PIPE TO COPPER TUBING
|
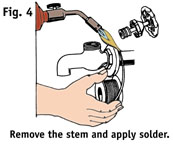 |
 REPLACING FAUCETS WITH SOLDERED ENDS
|
 |
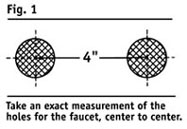
 INSTALLING 4" LAVATORY FAUCET WITHOUT POP-UP DRAIN
|
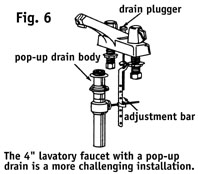 |
 INSTALLING 4" LAVATORY FAUCET WITH POP-UP DRAIN
|
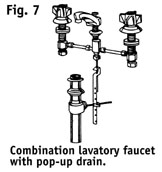 |
 INSTALLING COMBINATION LAVATORY FAUCET WITH POP-UP DRAIN
|
 |
 INSTALLING
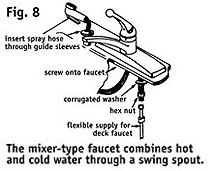
COMMON SINK FAUCETS INSTALLING
COMMON SINK FAUCETS
|
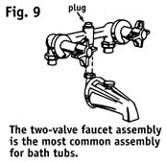 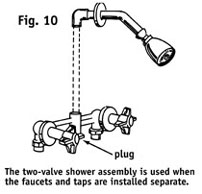 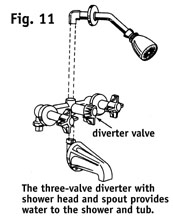 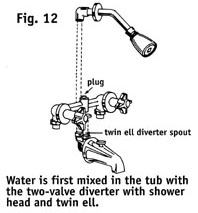 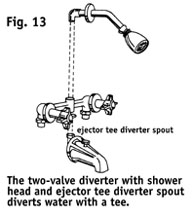 |
 INSTALLING BATH AND SHOWER FAUCETS
|
TOOLS AND MATERIAL CHECKLIST
| Pipe Wrench | Tubing Cutter | Basin Wrench | Vise | Solder | Flaring Tool |
| Propane Torch | Pipe Compound or Teflon Tape | Tubing Brush | Locking Pliers | Plumber's Putty | Hammer |
| Screwdriver | Transition Unions | Penetrating Oil | Solvent-Cement | Hand Cleaner | Adjustable Smooth Jaw Wrench |