|
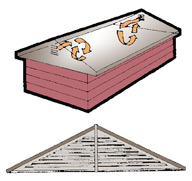
FIG.
1 - Gable vents are common in older homes; unfortunately, they are often inadequate because air flow is limited inside the attic.
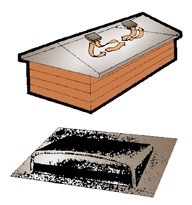
FIG. 2 - Roof line or eyebrow vents provide reasonably good ventilation–as long as you have enough of them.
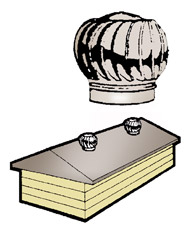
FIG. 3 - Turbine vents draw air out of the attic when spun by the wind. They can be very effective, but their effectiveness is reduced when the wind isn't blowing.
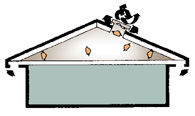
FIG. 4 - A fan-driven
power ventilator works well but consumes some of the energy you save in
reduced air conditioner use.
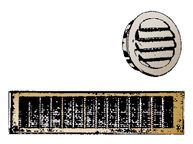
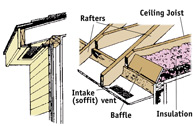
FIG. 5 - Any ventilation system depends on intake vents installed in the soffit to draw fresh air into the attic.
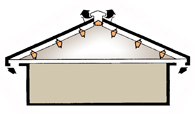
FIG. 6 - Most experts
agree that the most effective attic ventilation system consists of intake
vents spaced regularly along the soffit and a ridge vent running the length
of the roof. This creates an even wash of air along the entire underside
of the roof sheathing. |

VENTILATION BASICS
- Proper attic ventilation is an important part of a
healthy home–both for the structure and its occupants. This document
explains how attic ventilation protects a home from moisture and how
to install vents that will keep your home in good condition.
- There are a wide variety of sources of moisture in
a home, from the building materials themselves to normal everyday activities.
Cooking, bathing and washing clothes all release gallons of water vapor
into the air, for example.
- That vapor isn't a problem inside the average home
because the temperature inside the home is warmer than outside for much
of the year. Warm air holds more moisture–in the form of water
vapor–than cool air.
- The problem is that vapor gradually works its way out
of the living area and into the structure. As warm, moist air cools,
the vapor begins to condense into water droplets. If that happens inside
an unfinished attic, for example, it can get insulation and framing
materials wet. That not only reduces the value of your insulation but
can cause mold, mildew and rot.
- During the summer, when the outside temperature is
typically much higher than the inside temperature, attic ventilation
serves a different purpose. An unfinished attic builds up a tremendous
amount of heat, and if that heated air has no place to escape, it can
make the inside of the house much warmer or cause an air conditioning
system to work much harder to cool the house.
- Building codes specify the minimum amount of attic
ventilation needed in a new home to prevent winter moisture buildup,
but your summer needs are much greater. Also, older homes were often
built with inadequate attic ventilation–at least by today's standards–and
may need to be retrofitted with proper attic ventilation.
- A good attic ventilation system is designed for summer
needs. It includes two types of vents: intake vents are placed along
the soffit to allow fresh air into the attic, and exhaust vents are
installed in the upper third of the roof to allow attic air to escape.
The object is to create a continuous "wash" of air along the
underside of the roof sheathing. The rule of thumb in the summer is
that you should provide enough ventilation to completely change the
air in your attic every six minutes.
- There are three common types of intake vents:
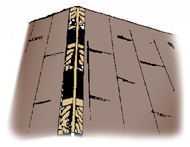
- Gable vents (Fig. 1) are triangular vents installed
in the gable wall just below the peak of the roof. As a rule, gable
vents are the least effective type of vent, because air circulates only
near the gables and does not wash the entire roof.
- Static vents, also known as roof line or eyebrow
vents, consist of a sheet metal cylinder with a flashing collar and
a metal hood to keep rain out. They are installed in rows along the
face of the roof by cutting holes in the roof, nailing the flashing
collars to the roof sheathing and shingling around the vents. Their
effectiveness depends on how many are installed; probably their greatest
disadvantage is that like any roof penetration, they may leak.
- Soffit vents are made usually with a screen
to keep insects out and of an aluminum panel with louvers punched into
the face to allow air flow. They may be 4" or 8" wide and
14" or 22" long, so they'll fit between 16" and 24"
on center rafters. They are installed simply by cutting rectangular
holes in the soffit and screwing the vent over the hole.
- A continuous soffit vent is of similar construction,
4" wide and 96" long. It is installed by cutting a long slot
in the soffit and screwing the vent over the hole.
- Circular vents range from 1" to 8"
in diameter. They are installed by drilling holes in the soffit and
pressing the vent into the hole.
- Exhaust vents fall into two basic categories.
Static vents simply allow air to escape while power ventilators actively
suck air out of the attic. Within each category there are a number of
types:
- Ridge vents are installed along the peak of
the roof and replace the ridge singles.
- Power Ventilators are turbine vents that consist
of a turbine mounted on a sheet metal cylinder. They are installed like
roof line vents along the face of the roof. When the wind blows, it
spins the turbine, which in turn draws air up out of the attic. Their
effectiveness, naturally, depends on whether the wind is blowing or
not.
- Fan-driven ventilators are powered by electricity and
usually controlled by a thermostat in the attic. They are very effective,
but since they are motor-driven, the extra cost of running them partially
offsets the energy they conserve.
- Most builders agree that a ridge vent system is the
most effective as well as the most cost-effective.
- The number of vents you'll need depends on the type
and size of the vents. Vents are rated according to their square inches
of "free vent area" (FVA)–in other words, the amount
of open space in the vent. You can't just measure the size of the vent
to find the FVA because the open space is reduced by louvers and by
the screen mesh that covers the opening.
- Most manufacturers provide both FVA ratings and ventilation
recommendations for their products. In order to estimate, you'll need
to know the total square footage of your attic and possibly the slope
of your roof. To find the square footage of your attic, multiply the
width of your house by the length.
- Roof slope is expressed as a ratio–for example,
a 5:12 slope means that the roof rises 5" vertically for every
12" of horizontal distance. To find the approximate slope of your
roof, go into the attic and measure the vertical distance from the peak
of the attic ceiling to the ceiling joists in feet (e.g., a 75"
measurement would be 6-1/4').
- Multiply that measurement by 24, then divide the result
by the width of your house (also in feet). The answer is the first half
of your slope ratio. For example, say your house is 30' wide, and the
peak-to-ceiling-joist measurement is 75" (6-1/4'):
6-1/4 x 24 = 150
150 divided by 30 = 5
Your slope is approximately 5:12
|